Website Design & Development
 Web Application Development
 Care Plans & Maintenance


Did you know that 43% of all websites on the internet are powered by WordPress? That's right—WordPress isn’t just a popular content management system; it's the platform of choice for businesses looking to build custom websites that are scalable, easy to manage, and optimized for conversions. Whether you're a small business or a growing startup, WordPress offers the tools you need to create a professional online presence.
If you’re new to WordPress, however, you might be wondering where to start. Building your own website can seem like a daunting task, but with the right guidance, it’s easier than you think.
In this guide, we’ll walk you through the essential steps to building your very own WordPress website—from choosing a domain name to customizing your pages and optimizing your site for performance.
Step 1: Choose Your Domain Name and Hosting Provider
Choosing the Right Domain Name
Your domain name is your website’s address on the internet, and it plays a significant role in your brand's identity and online presence. It’s often the first thing potential customers will encounter, so it’s important to pick one that aligns with your business and is easy to remember. Here are some tips to keep in mind:
- Keep It Short and Simple: Short, clear domain names are easier for users to remember and type. Avoid complicated spellings or long strings of words that could confuse visitors.
- Reflect Your Brand: Your domain name should match your business name or its key offering. It should also convey a sense of professionalism and be something people can easily associate with your business.
- Avoid Numbers and Hyphens: Numbers or hyphens can create confusion and make it harder for people to find your website. Stick with letters and avoid adding unnecessary punctuation.
- Use Keywords: If possible, include a relevant keyword in your domain name. For example, if you're a bakery, including “bakery” in your domain can help with SEO and make your website more discoverable.
- Choose the Right Extension: While .com is the most popular and trusted extension, other options like .net, .org, or even .store can work if .com is unavailable. However, prioritize .com for the best results.
Selecting a Reliable Hosting Provider
Your hosting provider is where your website lives on the internet. The performance, speed, and reliability of your website depend heavily on your hosting service, so it’s essential to choose a provider that supports WordPress and offers great value for your business needs.
Here are some important things to consider when selecting a hosting provider for your WordPress website:
- Look for WordPress-Specific Hosting: Many hosting providers offer specialized WordPress hosting, which is optimized for speed, security, and ease of use. Providers like Bluehost, SiteGround, and WP Engine are popular choices for WordPress users.
- Performance and Uptime: Choose a host with high uptime guarantees (ideally 99.9% or above) to ensure that your site remains accessible to visitors. Performance is key—slow websites can lead to high bounce rates and poor user experiences.
- Customer Support: Opt for a hosting provider that offers 24/7 support. WordPress issues can arise at any time, and responsive support ensures quick resolutions to any problems.
- Scalability: As your business grows, your website will likely need more resources. Choose a hosting provider that allows you to upgrade your plan as needed, ensuring you won’t face limitations down the road.
- Security: Security is a major concern for WordPress websites. Choose a hosting provider that offers automatic backups, SSL certificates, and other security features to keep your website and your customers' data safe.
By selecting the right domain name and hosting provider, you are setting the foundation for your website’s success. The right combination will ensure your website is professional, accessible, and capable of supporting your growing business needs.
Step 2: Install WordPress
Once you’ve chosen your domain name and hosting provider, the next step is to install WordPress. The good news is that installing WordPress is easier than ever, especially with one-click installs offered by most hosting providers. Follow these simple steps to get your WordPress website up and running in no time.
Method 1: One-Click Install (For Most Hosting Providers)
Many hosting providers, such as Bluehost, SiteGround, and HostGator, offer a one-click install feature for WordPress, making the process incredibly simple. Here's how to do it:
Log in to Your Hosting Account
Go to your hosting provider’s website and log in to your hosting control panel (also known as cPanel).
Find the WordPress Installer
In your cPanel, look for a section called "Website", "Software", or "Apps".
Look for an option called "One-Click Install", "WordPress Installer", or "Softaculous" (for hosts using Softaculous).
Click on WordPress
Once you find the WordPress icon or option, click it to start the installation process.
Select the Domain Name
Choose the domain name where you want to install WordPress (if you have multiple domains).
Ensure that the domain is connected to your hosting account.
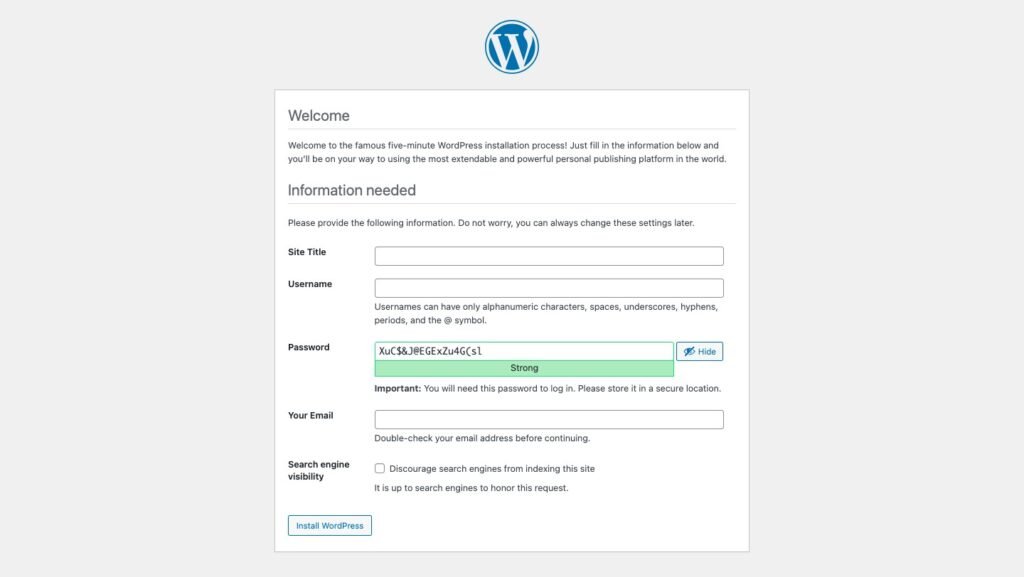
Fill in the Website Information
You will be asked to fill in basic details such as your website’s name, description, and your admin login credentials (username and password).
Make sure to choose a strong password for your WordPress admin account for security purposes.
Choose Your Installation Settings
You might be given the option to select the directory where WordPress should be installed (e.g., www.yourdomain.com or www.yourdomain.com/blog).
Leave the field blank if you want WordPress installed at the root of your domain.
Install WordPress
After filling out the necessary details, click the "Install" button. The process will take just a few moments, and WordPress will be installed automatically.
Access Your New Website
Once the installation is complete, you’ll receive a confirmation message with the login URL for your WordPress website.
This URL will look like this: www.yourdomain.com/wp-admin. Use the admin username and password you created earlier to log in to your WordPress dashboard and start customizing your site.
Method 2: Manual Install (For Advanced Users)
If your hosting provider doesn’t offer a one-click install, you can manually install WordPress. Here’s a more advanced way to do it:
Download WordPress
Go to the official WordPress website and download the latest version of WordPress.
Upload WordPress to Your Hosting Account
Using an FTP client (like FileZilla), upload the downloaded WordPress files to your hosting account’s root directory or the directory where you want WordPress to be installed.
Create a Database
Log in to your cPanel and navigate to the MySQL Databases section.
Create a new database and a new database user. Make sure to grant the user full permissions to the database.
Configure the wp-config.php File
In your WordPress folder, find the wp-config-sample.php file and rename it to wp-config.php.
Open the file and enter the database name, username, and password you just created.
Run the WordPress Installation
In your web browser, go to your domain (e.g., www.yourdomain.com). You should see the WordPress installation screen.
Follow the on-screen prompts to set your site’s name, admin credentials, and other basic settings.
Complete the Installation
Once the installation is complete, you can log in to your WordPress dashboard at www.yourdomain.com/wp-admin using the admin credentials you set up.
Step 3: Choose a Theme
Choosing the right theme is a crucial step in building your WordPress website. A theme determines the look and feel of your site, impacting everything from the layout to typography and color scheme. The right theme will not only enhance your website’s appearance but also ensure it meets your business needs and goals.
How to Choose a Theme That Fits Your Business Type and Website Goals
When choosing a theme, it's important to think about your business type and the specific goals of your website. Here are a few things to consider:
1. Identify Your Website’s Purpose
- Business/Branding Website: If your goal is to establish your brand online and showcase your products or services, look for themes that focus on clean, professional designs and easy-to-navigate layouts.
- eCommerce Website: If you’re planning to sell products online, choose a theme that supports WooCommerce (the most popular WordPress plugin for eCommerce). Themes optimized for WooCommerce will provide essential features like product pages, shopping carts, and payment gateways.
- Blog or Content-Focused Website: For businesses that want to focus on content and SEO, choose a theme that is easy to read and optimized for fast loading speeds. Look for themes that support large images, featured content areas, and clean typography.
- Portfolio or Creative Website: If you’re showcasing your creative work (e.g., photography, design, or art), choose a theme that emphasizes visual design with high-quality image galleries, portfolios, and custom layouts.
2. Check for Responsiveness
In today’s mobile-first world, it’s essential that your theme is responsive, meaning it adapts to different screen sizes. A responsive design ensures your website looks great and functions smoothly on mobile devices, tablets, and desktops. Most modern themes are responsive by default, but always check before making a decision.
3. Prioritize User Experience (UX)
A good theme should not only be aesthetically pleasing but also user-friendly. Look for themes with easy navigation, intuitive menus, and well-organized content. The theme should support a seamless user experience and encourage visitors to explore your website.
4. Check for Customization Options
Every business has its own unique identity. Look for themes that allow you to easily customize colors, fonts, logos, and other branding elements without needing to code. The more customization options a theme provides, the better you can tailor it to your brand.
5. Performance and Speed
A slow-loading website can lead to high bounce rates and lost visitors. Opt for themes that are optimized for speed and performance. Themes with a heavy design might look beautiful but could slow down your site. Prioritize themes that are lightweight and optimized for fast loading times.
Free vs Premium Themes
When it comes to themes, you’ll find both free and premium options. Each has its own pros and cons.
Free Themes:
Pros:
- Free themes are a great way to get started with WordPress without any upfront cost.
- There are many high-quality free themes available for various business types.
- Free themes are easy to install and often have the basic features needed for a small business website.
Cons:
- Limited customization options.
- Fewer features and integrations compared to premium themes.
- Free themes may have limited support or updates, leaving your website vulnerable to security issues in the long term.
- They may have fewer design options and may not be as unique.
Premium Themes:
Pros:
- Premium themes offer a lot more features, such as advanced customization, built-in premium plugins, and enhanced functionality.
- They often include built-in support and regular updates, ensuring your website remains secure and compatible with the latest WordPress version.
- More unique design options that set your website apart from others.
- You can find themes specifically designed for your business niche (e.g., real estate, restaurant, or medical services).
Cons:
- Premium themes come with a cost, usually ranging from $30 to $100 per theme, sometimes with additional charges for premium plugins or extended support.
- You may need to spend more time learning how to use the advanced customization options.
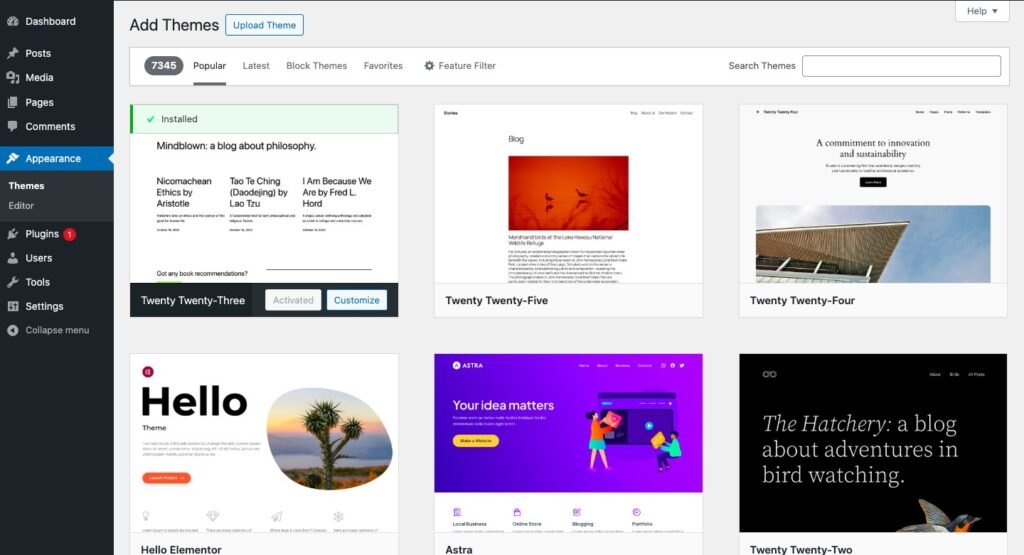
Where to Find WordPress Themes
WordPress Theme Repository
- The WordPress Theme Directory is the official source for free themes. You can find a large collection of free themes directly from your WordPress dashboard (under Appearance > Themes > Add New).
- The repository includes detailed descriptions, ratings, and reviews to help you choose the best theme for your site.
Theme Marketplaces
- ThemeForest: A popular marketplace for premium themes with a wide range of options across different niches.
- Elegant Themes: Known for its premium theme, Divi, which is highly customizable and offers extensive design options.
- StudioPress: Offers premium themes that are lightweight, secure, and mobile-friendly.
Independent Theme Developers
- Many WordPress theme developers sell premium themes on their own websites. Some well-known developers include CSSIgniter, TeslaThemes, and OceanWP.
- When purchasing from independent developers, always check for reviews and support availability.
Step 4: Customize Your Website
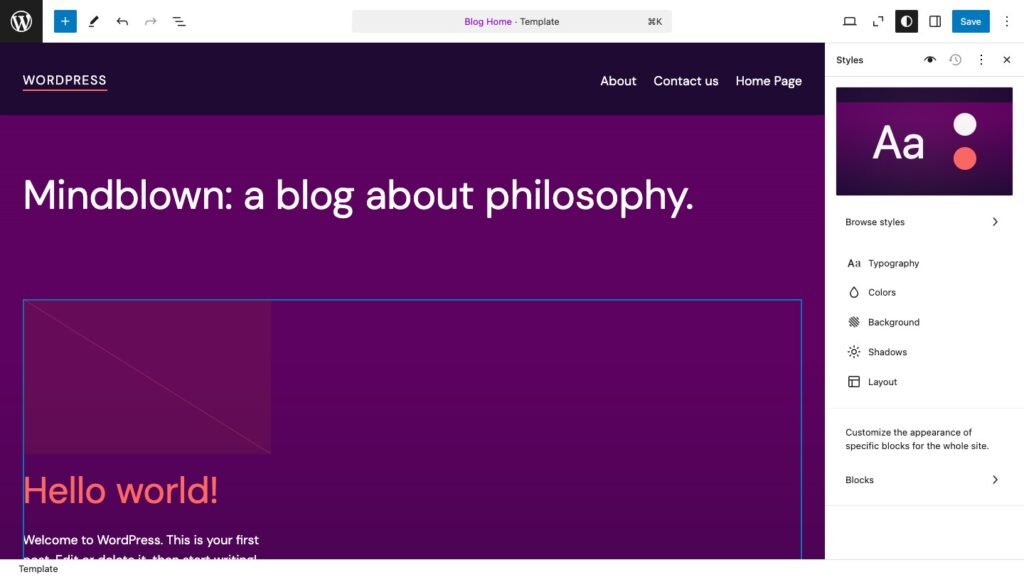
Once you've installed WordPress and chosen a theme, the next step is to customize your website so that it reflects your brand identity and goals. WordPress offers a built-in customization tool called the WordPress Customizer, which makes it easy to tweak your website’s design without needing to touch any code. Let’s walk through the customization process and focus on key elements like your logo, branding colors, and site layout.
Using the WordPress Customizer
The WordPress Customizer is a live, interactive tool that allows you to preview changes as you make them. To access it, follow these steps:
- Go to the WordPress Dashboard
- From the WordPress dashboard, navigate to Appearance > Customize.
- Explore the Customizer Options
- Once you're in the Customizer, you'll see a variety of options based on the theme you're using. These options may include site identity, colors, menus, widgets, and more.
- Preview Changes in Real-Time
- As you make changes to your website (e.g., changing the logo or modifying the color scheme), you can see a live preview of how your website will look in real-time.
- Publish Your Changes
- After making the desired changes, click the Publish button at the top of the Customizer to save your changes and make them live on your website.
Key Customization Areas to Focus On
- Logo and Branding
Your logo is a critical part of your brand identity, as it’s usually the first thing people notice about your business. Here’s how to customize it:- Upload Your Logo: In the Site Identity section of the Customizer, you'll find an option to upload your logo. Ideally, your logo should be a high-quality image that is clear and visually reflects your brand. For a crisp display, ensure your logo is appropriately sized—usually between 200px and 300px in width.
- Position and Size: Adjust the logo’s size and position if necessary. Many themes offer options to align your logo to the left, center, or right.
- Favicon: Don’t forget to set a favicon, the small icon that appears in the browser tab. It’s an easy way to reinforce your branding and make your website look more professional.
- Branding Colors
Consistent branding colors are essential for building trust and recognition with your audience. Colors evoke emotions and play a big part in your website’s design and user experience. Here’s how to set up your color scheme:- Go to Colors: Under the Colors section in the Customizer, you can adjust the primary colors of your site, including the background, text, and link colors. Choose colors that align with your business's personality and make sure they provide enough contrast for readability.
- Use Your Brand Palette: If you have a specific brand color palette, make sure to incorporate those colors into the design. Use tools like Adobe Color or Coolors to create a color scheme if you don’t have one yet.
- Test for Accessibility: Ensure your color choices are accessible. Tools like WebAIM’s color contrast checker can help you pick colors that are easy to read for people with visual impairments.
- Site Layout
The layout of your site defines the overall structure and flow of your content. A good layout ensures that users can easily navigate your site and find what they're looking for. Here’s how to customize the layout:- Header and Footer: Customize your site’s header to include your logo, navigation menu, and contact information. Many themes allow you to customize the footer to include additional details like social media icons, copyright information, or a newsletter sign-up form.
- Homepage Layout: Decide if you want a static homepage (with specific content) or a dynamic homepage (that displays recent blog posts). You can customize your homepage layout from the Homepage Settings section in the Customizer.
- Navigation Menus: Organize your site’s navigation menus to ensure visitors can easily find key pages. You can adjust the menus by going to Menus in the Customizer and creating custom menus for the main site navigation, footer, or sidebar.
- Sidebars and Widgets: Use the Widgets section to add extra features to your site, such as recent posts, social media feeds, or search bars. These widgets can be placed in sidebars or other widget-ready areas of your site.
- Content Layout: Depending on the theme, you can adjust the layout for individual pages, blog posts, and product pages. You may have options to switch between a one-column or two-column layout, adjust the page width, and customize the spacing between elements.
- Typography and Fonts
The typography you choose can have a significant impact on the readability and overall design of your website. Most themes provide options to change the font style and size.- Go to Fonts: In the Customizer, you’ll find a section for adjusting your website’s fonts. If your theme supports it, you can choose fonts from popular font libraries like Google Fonts.
- Font Pairing: Choose a combination of fonts that complement each other. Typically, you’ll use one font for headings and another for body text. Be sure to choose fonts that are legible and align with your brand personality.
Additional Customization Tips
- Optimize for Mobile: Always preview your customizations on mobile devices. Most WordPress themes are responsive, but it’s important to make sure your site looks good on smartphones and tablets as well.
- Preview and Test: Before publishing your changes, preview your website in multiple browsers (e.g., Chrome, Firefox, Safari) to ensure compatibility.

Step 5: Add Essential Plugins
Plugins are a powerful way to extend the functionality of your WordPress website. They can help you add key features like contact forms, improve SEO, boost website performance, and secure your site. In this step, we’ll go over some must-have plugins that are essential for every WordPress website, focusing on functionality, security, and SEO.
Must-Have Plugins for Functionality
Functionality plugins help to improve user experience, manage your site’s backend, and enhance the overall performance of your website. Here are some essential plugins to consider:
- WPForms
WPForms is a user-friendly plugin for creating contact forms, surveys, order forms, and other types of forms. With a simple drag-and-drop interface, you can quickly build and embed forms on your site.
Why It's Important: Contact forms are essential for collecting inquiries, building email lists, and engaging with your visitors. WPForms also supports anti-spam features and integrates with email marketing services like MailChimp and Constant Contact. - WooCommerce
If you're building an eCommerce website, WooCommerce is a must-have plugin. It’s the most popular and customizable solution for turning your WordPress site into an online store.
Why It's Important: WooCommerce allows you to sell physical products, digital downloads, subscriptions, and more. It comes with built-in payment gateways and offers a range of extensions to enhance your store. - Elementor
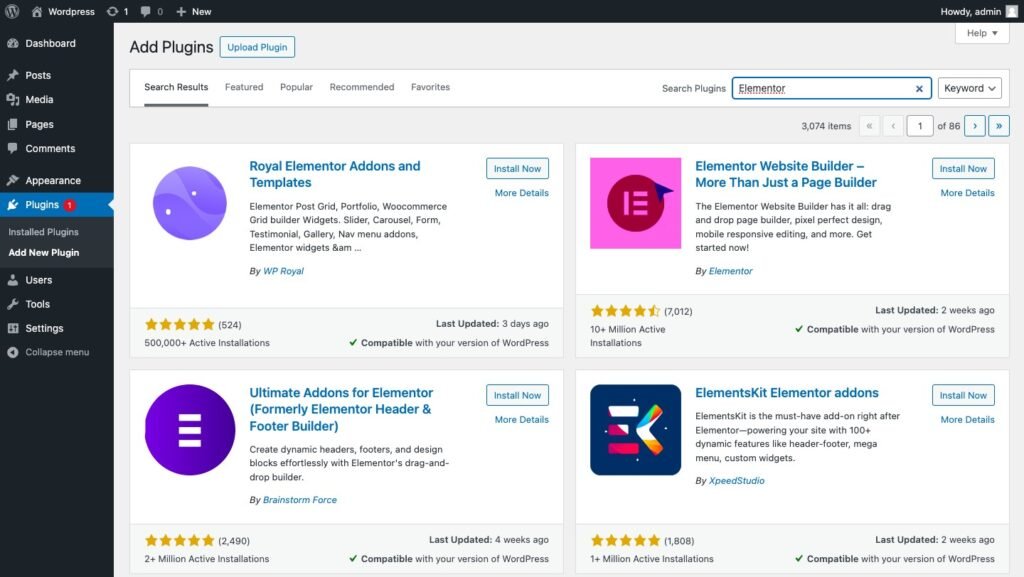
Elementor is a drag-and-drop page builder plugin that allows you to create custom pages with no coding skills required. It provides flexibility and control over your design with a visual interface.
Why It's Important: Elementor makes it easy to create highly customizable and professional-looking pages with features like widgets, templates, and design elements.
Must-Have Plugins for Security
Security is a top priority for any website. Hackers, malware, and other threats can damage your site’s reputation and cause downtime. These security plugins will help protect your website:
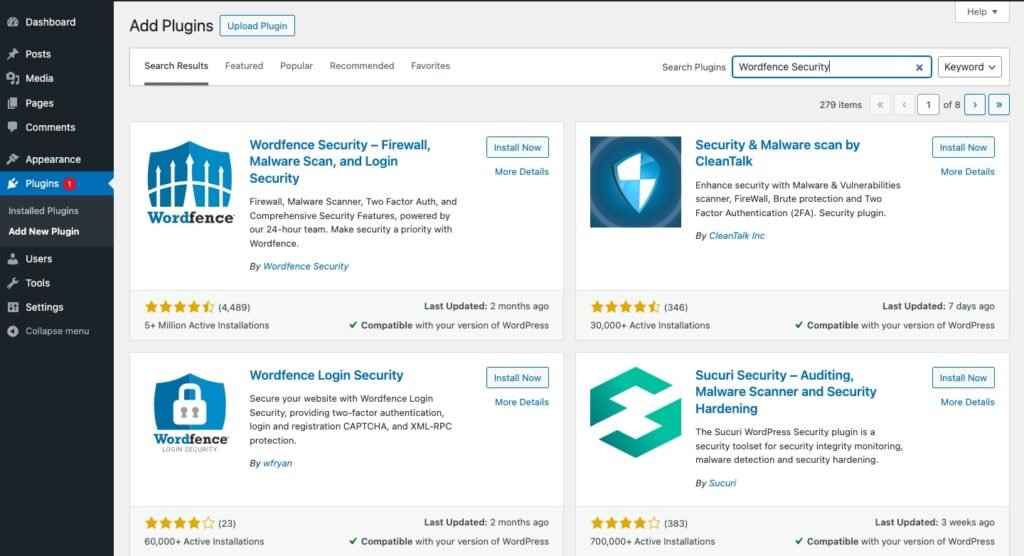
- Wordfence Security
Wordfence is one of the most popular WordPress security plugins. It includes features like firewall protection, malware scanning, login security, and real-time threat defense.
Why It's Important: Wordfence helps to protect your site from potential attacks by blocking malicious traffic, scanning for vulnerabilities, and providing alerts if any issues arise. - iThemes Security
iThemes Security offers over 30 ways to protect your WordPress site from hackers, including strong password enforcement, brute force protection, and two-factor authentication.
Why It's Important: This plugin hardens your website against attacks, offering features like file change detection and database backups, which are essential for maintaining the security of your site. - UpdraftPlus
UpdraftPlus is a backup plugin that allows you to automatically back up your entire website and store it safely in the cloud (e.g., Google Drive, Dropbox).
Why It's Important: Regular backups are crucial in case of data loss or a security breach. With UpdraftPlus, you can easily restore your site to a previous version in minutes.
Must-Have Plugins for SEO
Search engine optimization (SEO) is vital for driving organic traffic to your website. These SEO plugins help you optimize your website for search engines, improve rankings, and make it more discoverable:
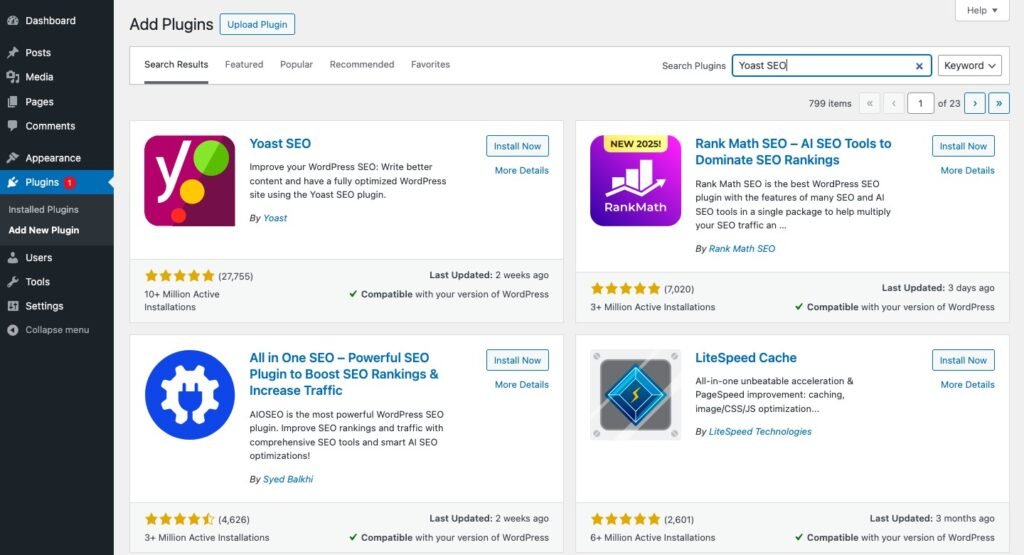
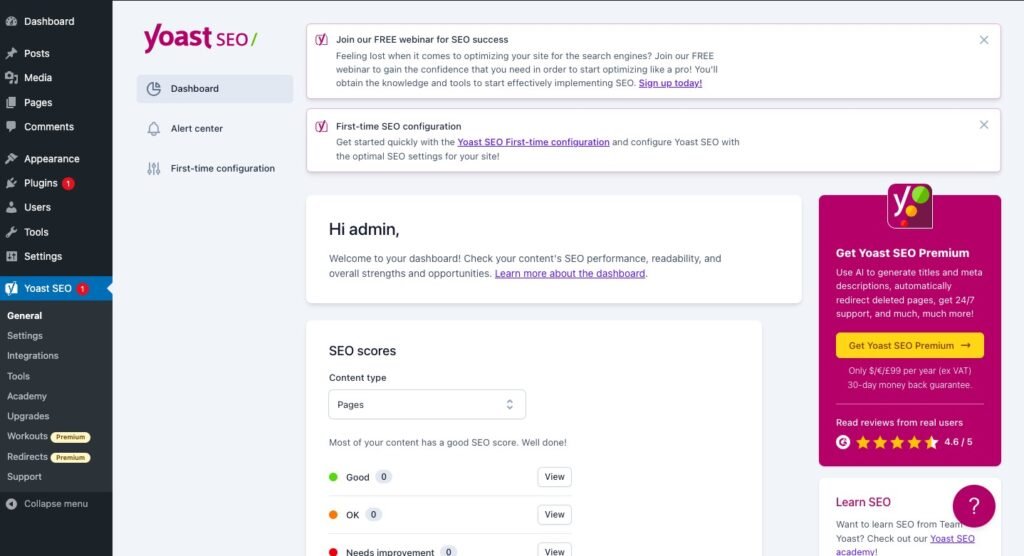
- Yoast SEO
Yoast SEO is one of the most widely used and powerful SEO plugins for WordPress. It helps optimize your website’s content with on-page SEO features like keyword analysis, meta descriptions, and content readability.
Why It's Important: Yoast SEO helps you create SEO-friendly content, ensures your site is crawlable by search engines, and provides actionable insights for improving rankings. - Rank Math
Rank Math is an alternative to Yoast SEO that provides advanced SEO tools such as integration with Google Search Console, rich snippets support, and 404 error monitoring. It also includes an SEO audit tool and can manage redirects.
Why It's Important: Rank Math is a robust SEO tool that provides excellent features for keyword optimization, schema markup, and overall site performance—especially useful for larger sites. - WP Rocket
WP Rocket is a caching plugin that helps speed up your website by improving load times. It includes features like page caching, image lazy loading, and database optimization.
Why It's Important: Website speed is a ranking factor for SEO, and WP Rocket helps you optimize load times to provide a better user experience while boosting your search engine rankings.
Bonus Plugins for Performance and Optimization
While functionality, security, and SEO are essential, performance plugins also play an important role in ensuring your website is fast and efficient. Here are a few to consider:
- Smush Image Compression and Optimization
Smush is a powerful plugin that automatically compresses and optimizes images on your site, reducing their size without losing quality.
Why It's Important: Large image files can slow down your website. Smush helps optimize images to improve load speeds, which is crucial for SEO and user experience. - Autoptimize
Autoptimize is a performance optimization plugin that aggregates, minifies, and caches scripts and styles, making your website load faster.
Why It's Important: By optimizing your website’s code, Autoptimize helps reduce page load times, improving both user experience and search engine rankings.
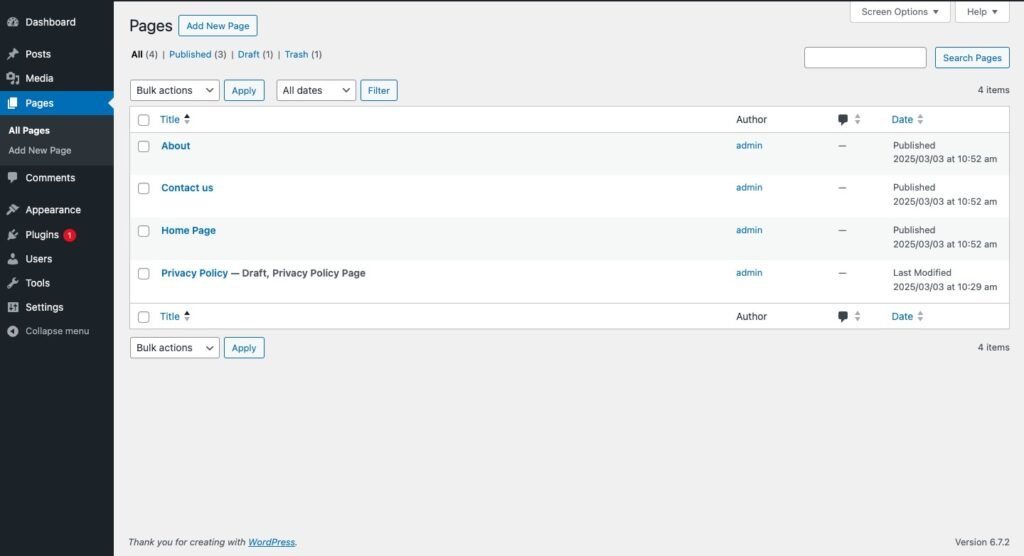
Step 6: Create Key Pages
Now that your website is set up and customized, it's time to add the core pages that will form the foundation of your site. These key pages serve as the cornerstone of your online presence and guide visitors to understand what your business offers, who you are, and how they can get in touch. Let's walk through the most important pages to include on your website.
Home Page
The Home Page is typically the first page visitors will land on when they visit your website. It serves as the introduction to your business and should provide a clear, engaging overview of what you offer. Here’s what to include:
- Hero Section: A prominent headline that clearly communicates what your business is about, along with a strong call to action (CTA) such as "Get Started" or "Contact Us."
- Overview of Services or Products: Briefly describe your core services or products, with links to the relevant pages for more information.
- Trust Signals: Include testimonials, client logos, or certifications that help build trust with visitors.
- Navigation Links: Ensure easy access to other key pages such as About, Services, and Contact.
About Page
The About Page is where you tell your story and explain why your business exists. It helps build a connection with your audience by showcasing your values, mission, and unique selling points. Here's what to include:
- Business Story: Share the history of your company, how it started, and why it’s important.
- Mission and Values: Highlight your core values and mission statement to show what your company stands for.
- Team Members: If applicable, introduce your team, including their photos and roles within the company. This helps humanize your brand and builds trust.
- Why Choose You?: Explain why customers should choose your services or products over competitors. Focus on your unique selling points and what sets you apart.
Services Page
The Services Page is a crucial part of your website, especially if you're offering a service-based business. This page should clearly describe the services you offer and how they can benefit your customers. Key elements to include:
- Service List: Provide an overview of each service, including a short description. For example, if you run a web development company, you might list services like "Website Design," "SEO Optimization," and "E-commerce Solutions."
- Service Details: For each service, add a section that explains what the service includes, how it works, and the benefits to the customer.
- Pricing (Optional): If appropriate, you can include pricing information or a CTA that encourages visitors to get a quote or schedule a consultation.
- Call to Action: End the page with a strong call to action that encourages visitors to take the next step, such as contacting you or booking a consultation.
Contact Page
The Contact Page is where visitors can reach out to you with inquiries, support requests, or business opportunities. It's crucial to make this page easy to find and straightforward to use. Here's what to include:
- Contact Form: A simple, easy-to-fill-out form where visitors can send you a message. Include fields for name, email, subject, and message.
- Phone Number and Email: Make it easy for visitors to contact you directly by listing a business phone number and email address.
- Physical Address (if applicable): If you have a physical location, include your address along with a map to help visitors find you.
- Social Media Links: Link to your social media profiles, making it easy for visitors to connect with you on platforms like Facebook, Twitter, and LinkedIn.
Blog Page
The Blog Page is essential for providing valuable content that helps your audience. Whether you're sharing industry insights, how-to guides, or business updates, a blog is a great way to keep your website fresh and engage with visitors. Key components to include:
- Content Categories: Organize your blog posts into categories (e.g., "Web Design Tips," "SEO Strategies," "Product Updates") to make it easier for visitors to find content that interests them.
- Recent Posts: Display a list of recent posts on your blog page to keep content fresh and encourage visitors to explore your website further.
- Search Functionality: Include a search bar to help visitors quickly find the articles or topics they’re interested in.
- CTA for Newsletter Signup: Encourage visitors to subscribe to your blog’s newsletter so they can receive updates when new content is posted.
Bonus Pages to Consider Adding
While the five pages above are essential, you may want to consider adding these additional pages depending on your business type:
- FAQ Page: A Frequently Asked Questions (FAQ) page can help answer common questions, reducing the number of inquiries you receive and providing visitors with quick answers.
- Testimonial/Case Study Page: If you have satisfied clients or successful case studies, a dedicated page for testimonials or case studies can help build trust and showcase your credibility.
- Privacy Policy and Terms of Service: These pages are essential for legal reasons and can help protect your business. If you're collecting personal data (like email addresses), make sure your privacy policy complies with regulations like GDPR.
Step 7: Optimize for SEO
Search Engine Optimization (SEO) is the practice of improving your website’s visibility in search engines like Google. By optimizing your website for SEO, you can increase your chances of ranking higher on search results, driving more organic traffic, and attracting potential customers. In this step, we’ll discuss key strategies to help you optimize your website for SEO and boost its online presence.
Conduct Keyword Research
Keyword research is the foundation of SEO. By identifying the right keywords—terms and phrases your potential customers are searching for—you can ensure your content is aligned with their search intent. Here’s how to conduct keyword research:
- Use SEO Tools: Tools like Google Keyword Planner, Ubersuggest, and Ahrefs allow you to discover relevant keywords and analyze their search volume and competition.
- Focus on Long-Tail Keywords: Long-tail keywords (e.g., "best web development services for small businesses") are longer, more specific phrases that often have lower competition and higher conversion potential.
- Optimize for User Intent: Make sure the keywords you target match the intent of your visitors. Are they looking for information (informational), ready to buy (transactional), or comparing options (navigational)?
Optimize On-Page SEO
On-page SEO refers to optimizing the elements within your website to improve its search engine ranking. Key on-page SEO factors include:
- Title Tags and Meta Descriptions: Each page on your website should have a unique title tag (the clickable headline in search results) and meta description (the summary that appears below the title in search results). These should include your target keyword and be compelling to encourage clicks.
- Example: For a web development company, a title tag could be: “Professional Web Development Services for Small Businesses | Your Company Name.”
- Header Tags (H1, H2, H3): Use header tags to structure your content and make it easier for search engines and users to understand. The H1 tag should be reserved for the main headline of the page (usually the title), and H2 and H3 tags can be used for subheadings to organize your content.
- URL Structure: Ensure that your URLs are clean, descriptive, and include keywords when possible. For example, a URL like www.yoursite.com/web-development-services is more SEO-friendly than www.yoursite.com/page1.
- Internal Linking: Link to other relevant pages within your website to help search engines understand the structure of your site. Internal links also improve user experience by guiding visitors to more content on your site.
Improve Website Speed
Page load speed is an important ranking factor for SEO. Websites that load faster offer a better user experience, and search engines prioritize these sites. Here are ways to improve speed:
- Use Caching Plugins: Plugins like WP Rocket or W3 Total Cache can help speed up your site by caching static files, reducing the load time for repeat visitors.
- Optimize Images: Large image files can significantly slow down your website. Use plugins like Smush to compress and optimize images without sacrificing quality.
- Minimize HTTP Requests: Limit the number of external resources (like scripts, stylesheets, or ads) that your website requests during a page load. This can help reduce load time.
- Use a Content Delivery Network (CDN): A CDN like Cloudflare can store copies of your website on multiple servers worldwide, ensuring faster load times for visitors regardless of their location.
Mobile Optimization
With mobile-first indexing by Google, having a mobile-friendly website is no longer optional—it’s essential for SEO. Here’s how to optimize for mobile:
- Responsive Design: Ensure your website theme is responsive, meaning it adapts to different screen sizes (desktop, tablet, mobile). Most modern WordPress themes are responsive by default, but it’s important to test it using tools like Google’s Mobile-Friendly Test.
- Simplified Navigation: On mobile devices, screen space is limited, so it’s essential to have a simple and intuitive navigation menu. Ensure your mobile users can easily find what they need without excessive scrolling.
- Mobile-Friendly Forms: If you have forms (e.g., contact forms), ensure they’re easy to complete on mobile devices with large, tappable buttons and fields.
Use Structured Data (Schema Markup)
Structured data, also known as schema markup, helps search engines understand your content better and can improve your visibility with rich snippets. This can be particularly useful for:
- Local Businesses: Schema markup can display your business name, address, phone number, and reviews directly in search results, improving visibility and encouraging click-throughs.
- Products and Reviews: For eCommerce websites, you can use schema to display product ratings, prices, and availability in search results.
You can add structured data manually or use plugins like Yoast SEO or Schema Pro to implement it easily.
Build Quality Backlinks
Backlinks (links from other websites to yours) are a major ranking factor for SEO. The more authoritative, relevant backlinks you have, the higher your site will rank. Here are strategies to build backlinks:
- Guest Blogging: Write guest posts for reputable websites in your industry and include a link back to your site.
- Create High-Quality Content: Producing valuable, shareable content (like blog posts, infographics, or case studies) can naturally attract backlinks from other websites.
- Collaborate with Influencers: Partner with influencers or industry leaders for interviews or collaborations, which can result in high-quality backlinks.
Regularly Update Content
Search engines love fresh content, so regularly updating your website with new blog posts, articles, or product pages is crucial for SEO. Also, update older pages with new information, as this can boost your rankings for those pages.
- Blog Posts: Regularly publish blog posts on relevant topics, targeting different long-tail keywords.
- Update Old Content: Revise old content to keep it relevant, add new information, and refresh internal and external links.
Monitor Your SEO Performance
To track your progress, you’ll need to monitor key metrics like organic traffic, bounce rate, and keyword rankings. Use tools like:
- Google Analytics: Provides detailed insights into your website traffic, audience behavior, and performance.
- Google Search Console: Helps track your website’s performance in search results, showing how often your site appears, which keywords are driving traffic, and if there are any issues that need to be fixed.
Step 8: Launch and Promote Your Website
After months of planning, designing, and developing, it’s time to launch your website! However, the launch is just the beginning. To make sure your website reaches its intended audience and attracts visitors, you’ll need a strong promotional plan. In this step, we’ll guide you through the process of launching your website and implementing effective marketing strategies to grow your online presence.
Prepare for Launch
Before launching your website, make sure everything is in place to ensure a smooth rollout. Here’s a checklist to get you ready:
- Test Your Website: Go through every page of your website and test all the links, forms, and functionalities to make sure they work as expected. Double-check the mobile responsiveness and page speed.
- Set Up Google Analytics: Install Google Analytics on your website to track visitors, analyze user behavior, and monitor your website’s performance. This will give you valuable insights into how visitors interact with your site.
- Create a Sitemap: A sitemap helps search engines index your website more efficiently. You can use plugins like Yoast SEO to generate a sitemap and submit it to Google Search Console.
- Optimize for SEO: Ensure that all on-page SEO elements, including meta descriptions, title tags, header tags, and alt text for images, are properly configured. This will help improve your search engine visibility from day one.
Officially Launch Your Website
Once your site is fully tested and optimized, it’s time to launch. Here’s how to officially launch:
- Remove Password Protection: If your website was in development mode or behind a password, make sure to remove it before launching.
- Double-Check Domain and Hosting: Ensure your domain name is connected to your hosting account and that everything is functioning correctly. If you’re moving from a development environment, update your domain’s DNS settings.
- Announce the Launch: Share the news of your website’s launch with your audience. Whether it's via email, social media, or other channels, make sure to inform your followers, subscribers, and customers that your site is live and ready to visit.
Promote Your Website to Attract Visitors
Now that your website is live, you need to focus on driving traffic to it. Here are some effective marketing strategies to help you attract visitors and customers:
Social Media Promotion
Social media is a powerful tool for promoting your website and engaging with your audience. Here’s how to use it effectively:
- Create Social Media Profiles: If you haven’t already, create profiles for your business on major social media platforms like Facebook, Instagram, Twitter, LinkedIn, and Pinterest. Make sure to include a link to your website in your bio or profile description.
- Share Engaging Content: Post regularly on social media, sharing engaging content related to your business. This could include blog posts, product updates, promotions, behind-the-scenes content, and customer testimonials. Include links to your website in your posts to drive traffic.
- Leverage Visual Content: Visual content such as images, videos, infographics, and stories tends to perform better on social media. Use these types of content to showcase your products, services, or blog content and encourage visitors to click through to your website.
- Use Hashtags: Research relevant hashtags for your industry and use them in your social media posts to reach a broader audience. Hashtags help potential customers discover your content and visit your website.
- Run Social Media Ads: Platforms like Facebook and Instagram offer targeted advertising, allowing you to reach specific demographics. Running paid ads can help increase visibility and drive traffic to your website.
Email Marketing
Email marketing is an effective way to promote your website and keep your audience engaged. Here’s how to leverage email marketing:
- Build an Email List: Start building an email list by offering something of value to your visitors, such as a free eBook, discount, or newsletter signup. Use tools like Mailchimp or ConvertKit to manage your email list.
- Send Launch Announcement Emails: Once your website is live, send an email to your subscribers announcing the launch. Include a call to action (CTA) encouraging them to visit the site and explore what you offer.
- Nurture Leads with Email Sequences: Create an automated email sequence to nurture leads and guide them through your sales funnel. For example, welcome emails, educational content, and promotional offers can encourage visitors to return to your website.
- Include a CTA in Every Email: Make sure every email you send includes a CTA that directs readers back to your website. Whether it’s a blog post, product page, or contact form, include a link to your site in every message.
Content Marketing and Blogging
Blogging is a long-term strategy to drive organic traffic to your website. Here’s how to incorporate content marketing into your strategy:
- Start a Blog: Regularly publish blog posts on topics relevant to your industry. Provide value to your readers by offering tips, insights, and solutions to their problems. Blog content can drive organic search traffic, help with SEO, and position your brand as an industry leader.
- Optimize for SEO: Use the keywords identified in your research to optimize your blog posts for search engines. This will improve the visibility of your posts on search results and attract more visitors to your site.
- Guest Blogging: Contribute guest posts to reputable websites in your industry. Include a link back to your website in your bio or within the content to drive traffic from other sources.
Search Engine Marketing (SEM)
Search Engine Marketing (SEM) allows you to pay for traffic through search engines like Google. Here’s how to use SEM effectively:
- Google Ads: Run targeted Google Ads campaigns to appear at the top of search results for relevant keywords. Google Ads can drive immediate traffic to your website while you work on long-term SEO strategies.
- Retargeting Ads: Implement retargeting ads to target visitors who have already visited your site but didn’t take the desired action (e.g., purchase, contact form submission). These ads can help bring them back to your website and convert them into customers.
Influencer Marketing and Partnerships
Working with influencers and partners in your industry can help increase your website’s visibility:
- Collaborate with Influencers: Reach out to influencers in your industry who have an engaged audience. Offer them your product or service in exchange for a review or a mention of your website.
- Partner with Other Brands: Consider cross-promoting your website with complementary businesses or brands. This could include joint content, giveaways, or bundled promotions that drive traffic to your site.
Step 9: Partner with a WordPress Development Company
While building a WordPress website can be a rewarding project, it can also be a complex and time-consuming process. Whether you're a small business or a growing startup, partnering with professional WordPress development company can ensure your website is not only well-built but also tailored to meet your specific business goals. We offers expertise and support that can save you time, reduce the complexity of the development process, and deliver a polished final product.
Aligning Your Website with Business Goals
One of the most important aspects of building a website is ensuring it meets your business goals. A professional WordPress development company like Glopbe has experience in understanding your objectives and translating them into a functional, goal-driven website. Here’s how a partnership can help:
- Tailored Solutions: Professional developers can design and develop a website that’s specifically suited to your business needs. Whether you're looking to generate leads, sell products, or build brand awareness, your website will be customized to align with your unique objectives.
- Strategic Planning: A development company will help plan out the site structure, user experience (UX), and features that will drive conversions and engagement. With their expertise, they can ensure the website serves as a tool to reach your business goals.
Scalability for Future Growth
As your business grows, your website needs to evolve with it. A website that’s not built with scalability in mind can become limiting as you add new products, services, or features. Partnering with a WordPress developers like Glopbe ensures that your site is built with future growth in mind.
- Flexible Architecture: Our WordPress Development team can build your website with a flexible architecture that can easily accommodate future expansions. Whether you need to add new pages, integrate third-party tools, or scale your eCommerce store, a professional developer will ensure the site is structured to support those changes.
- Long-Term Support: A WordPress development company provides ongoing support and maintenance, helping your website remain up-to-date and functional as your business and technology evolve.
Customization to Reflect Your Brand
Your website is a reflection of your brand, and it should communicate your values, aesthetics, and vision. Partnering with a professional development company allows you to create a fully customized website that aligns with your brand’s identity.
- Brand Consistency: A professional team ensures that every element of your website, from the color scheme to the typography and layout, aligns with your brand guidelines. This consistency builds trust with your audience and strengthens your brand image.
- Unique Features: With Glopbe's expertise in WordPress, you can incorporate unique features that set your website apart from competitors. Whether it's custom plugins, dynamic content, or a specialized design, a development company can bring your creative vision to life.
Time and Resource Efficiency
Building a website takes time—especially if you're trying to learn WordPress development on your own. Working with a WordPress development company like Glopbe can save you valuable time and resources, allowing you to focus on running your business while the experts handle the technical aspects.
- Faster Development Process: Professional developers have the experience and resources to complete the project efficiently. They know how to avoid common pitfalls and can streamline the development process, ensuring a quicker launch.
- Avoiding Mistakes: When you're not familiar with WordPress development, it’s easy to make mistakes that could cost time and money. A professional team like Glopbe knows how to handle the technical details, reducing the risk of errors and delays.
- Project Management: A development company will take the lead on managing the project from start to finish, ensuring that deadlines are met and the project stays on track. This allows you to focus on the bigger picture, knowing that the technical work is in expert hands.
Reducing Complexity
WordPress can be an overwhelming platform if you're not familiar with its ins and outs. From selecting themes to configuring plugins and ensuring everything runs smoothly, the process can quickly become complicated. Working with Glopbe simplifies this process, ensuring that all technical aspects are handled by professionals.
- Expert Technical Support: Glopbe’s team of developers can guide you through every step of the process, from installation to customization and troubleshooting. Their expertise helps to eliminate confusion and ensure a smooth experience.
- Seamless Integrations: Professional developers can seamlessly integrate third-party tools and software with your WordPress website, such as payment gateways, CRM systems, and marketing tools. This ensures your website functions as a powerful business tool without unnecessary complications.
Polished, Professional Final Product
A well-designed, fully functional website is essential for making a strong impression on your audience. A professional WordPress development company ensures your website is polished, user-friendly, and performs flawlessly.
- Design and User Experience (UX): Glopbe’s team will create a website with an intuitive, easy-to-navigate design. They will ensure the layout is clean, the content is well-organized, and the website’s design reflects your brand’s personality.
- Responsive Design: With mobile traffic accounting for over half of global website visits, having a responsive design is critical. Glopbe ensures your website looks and works great on all devices, from desktop computers to smartphones.
- Security and Performance: A professional development company will implement best practices for security and performance optimization, ensuring your website is fast, secure, and provides a seamless experience for visitors.
Conclusion
Building a WordPress website may seem like a big task, but breaking it down into manageable steps makes the process much more straightforward. By choosing the right domain, selecting a reliable hosting provider, and customizing your site with a responsive theme and key plugins, you can create a site that meets both your business goals and your customers’ needs. Following the steps outlined will ensure your site is user-friendly, SEO-optimized, and ready for growth.
However, as your website grows, you may find that it requires ongoing updates, security measures, and technical expertise. Partnering with a professional WordPress development company like Glopbe can provide the necessary support to ensure your site continues to evolve with your business. With Glopbe's expertise, you can save time, reduce complexity, and have a fully customized site that aligns with your brand.
If you’re ready to take your website to the next level or need help navigating the complexities of WordPress development, We are here to assist. Reach out to us today, and let our experienced team help you build a site that not only looks great but also serves your business's long-term success.